WHAT IS A DRY-EDGE ON LABEL SHEETS?
This is an A4 sheet of labels on which a 1mm wide strip of label face-stock and adhesive has been removed from around all 4 edges of the sheet, leaving only the dry backing material. The edge waste is removed during the production cutting of the labels and label sheets, for the purpose of preventing the production of label sheets with a wet-edge.
WHAT IS A WET-EDGE ON LABEL SHEETS?
 Wet-edge is a term used to describe the leaching of
adhesive from between the label face-stock and the silicon release-liner and backing or label
carrier.
This is most commonly caused by pressure, although temperature can also be a contributory factor. For example, if the raw material coil has been wound too tightly by the manufacturer, then once converted into cut label sheets the plasticised adhesive layer that was under pressure and migrating toward the open edge, can still be leaching at the sheet edges and feel slightly “tacky” to the touch.
Similarly, if label sheets are left in potentially high temperature locations such as window sills in direct sunlight or on top of a heat source like a radiator then this could also lead to a heating and plasticisation of the adhesive, contributing to a similar outcome.
WHY IS THIS A PROBLEM
When plain label sheets are being printed on a desktop or larger free-standing laser printer, the sheets of labels will pass through several full-width rollers around the imaging drum in addition to transporter rollers elsewhere in the assembly, which may not all be full-width.


If the label sheets are slightly leaching adhesive along the edges (long and short) then this eventually transfers small amounts of adhesive onto the rollers which cause problems with print quality and registration.

The small amounts of adhesive transferred onto the transfer and fusing rollers initially causes problems with the print output quality by transferring onto subsequent sheets, which can assist further migration across the effected rollers and will also pick-up toner and transfer this onto the labels, ruining the print quality with image ghosting (shadow) or worse and potentially will also be visible on future print runs.
Adhesive on the rollers will also pick-up dust and fibre from the substrates being printed and can deposit this onto the print surface, which when brushed off the printed surface will then leave small white areas without print coverage, often giving the printed labels a speckled appearance.
Also, while the adhesive now on the rollers is still wet, this can result in labels actually being lifted from the sheet and adhering to the roller. Which If this is the fuser roller, will potentially result in areas of missing print on the label sheet and will require the print-run to be stopped while the label is removed and the roller cleaned.

Any amount of adhesive transferred from label sheets onto the rollers, even the small transport rollers needs to be cleaned, because the distances of the upper and lower roller sets are calibrated tolerances for the thickness of the varying substrates being printed e.g. standard matt paper, coated papers, labels, photopaper etc and if the adhesive is left to harden, the tolerances can be compromised and the rollers are then not correctly controlling the substrate in the transport path. When this happens even fractional movement through lack of grip can cause misalignment of the sheets taken from the printer feed-tray, with poor print registration as a consequence.
Eventually if left unattended adhesive deposited onto rollers can also cause paper jams with subsequent non-label print runs. When this happens, there is no choice other than to stop the print run and attempt maintenance by cleaning the rollers concerned. Some OEM’s produce a cleaning kit for their printers and in every case, you should always refer to the printer manual and/or user guide. Assistance with this can often be found on OEM’s websites and customer support forums.
Once cleaning of the rollers is completed, it is best practice to always first test by using a blank sheet of paper run through the printer and check to ensure that it emerges clean and free from glue and toner marks.
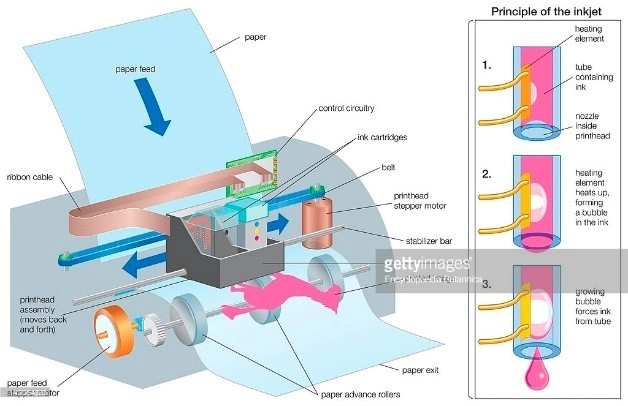
The problem is similar with desktop inkjet printers, if slightly lessened in propensity by the absence of so many full-width rollers because of the different technology. Inkjet is a contactless print method, with a moveable set of print-heads and does not therefore require an image transfer roller and a set of fuser rollers.


However even in small desktop printers there are transport rollers and the principle remains that adhesive transfer will cause problems with print output quality and printer productivity.
HOW DO “DRY EDGE” EURO-DIE SHEETS PREVENT THIS PROBLEM
By removing a 1mm strip of label and adhesive from all 4 edges of the label sheet the adhesive moved to
the sheet edges by pressure, is removed leaving a dry backing area in its place, without compromising
the layout of the labels on the sheet. Ensuring dry, fast, problem free printing of your labels.
Most printers are not able to print edge-to-edge on A4 sheets and leave an unprintable area of 3mm–5mm around the edge, therefore the removal of 1mm of label face-stock has no detrimental impact on the label layout on the sheet.
Other benefits include the ease of removal for full sheet (A4) and half-sheet (A5) label formats that previously would have required a cut in the backing paper (back-cut/crack-back) to assist with the label peeling.
SUMMARY – WHY TAKE THE RISK?
While the problem of “wet edge” label sheets is hopefully very much the exception and not the norm, why take the unnecessary risk?
If you are unfortunate enough to experience this problem, not only is your label printing going to be disrupted, but you are going to have to undertake unnecessary cleaning and maintenance on your printer. Why when “dry-edge” label sheets are readily available to purchase on line, at no extra cost and improve the alignment and speed of problem free printing, would you choose not to select this format?


